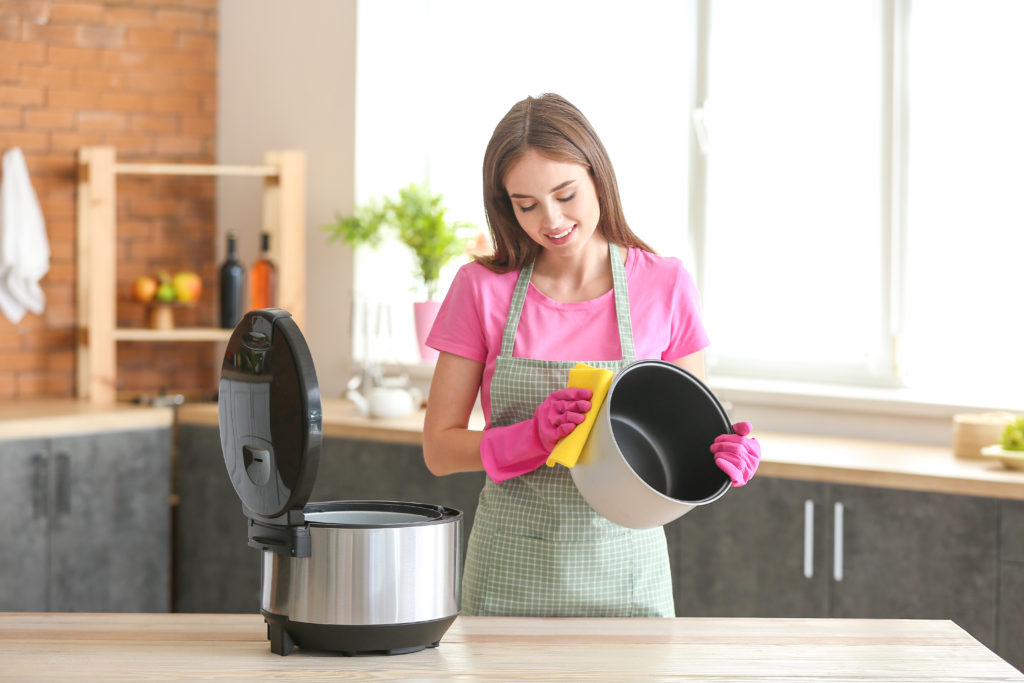
Learning how to clean pressure cooker can keep it in perfect working order, allowing you to get years of use out of it. Properly maintaining and cleaning your pressure cooker should be done after each use. This will not only keep it in perfect working order, but it will also prevent cross-contamination.
I’ve included several methods you can use to clean both the base and lid, in addition to tips and tricks that can help restore your aluminum cooker to its former glory and what you can do to remove burnt-on food and stains.
Learning how to clean pressure cooker will keep it working great and allows it to cook food more efficiently.
- For regular maintenance, soak the pot for half an hour after use. Take the lid apart and clean each of the components separately.
- If you’re dealing with burnt-on food, you can soak the pot in warm water and baking soda. For tough stuck-on food, try filling up the pot and boiling it for twenty to thirty minutes. Next, use a soft sponge to remove any softened food particles.
- To clean an aluminum pressure cooker, clean the pot as you normally would, then use silver polish on the exterior to restore its shine.
There are many ways you can keep your pressure cooker looking new and working great, however, regular maintenance after each use is very important and will have the most impact on cooking efficiency.
Table of Contents
Getting Started
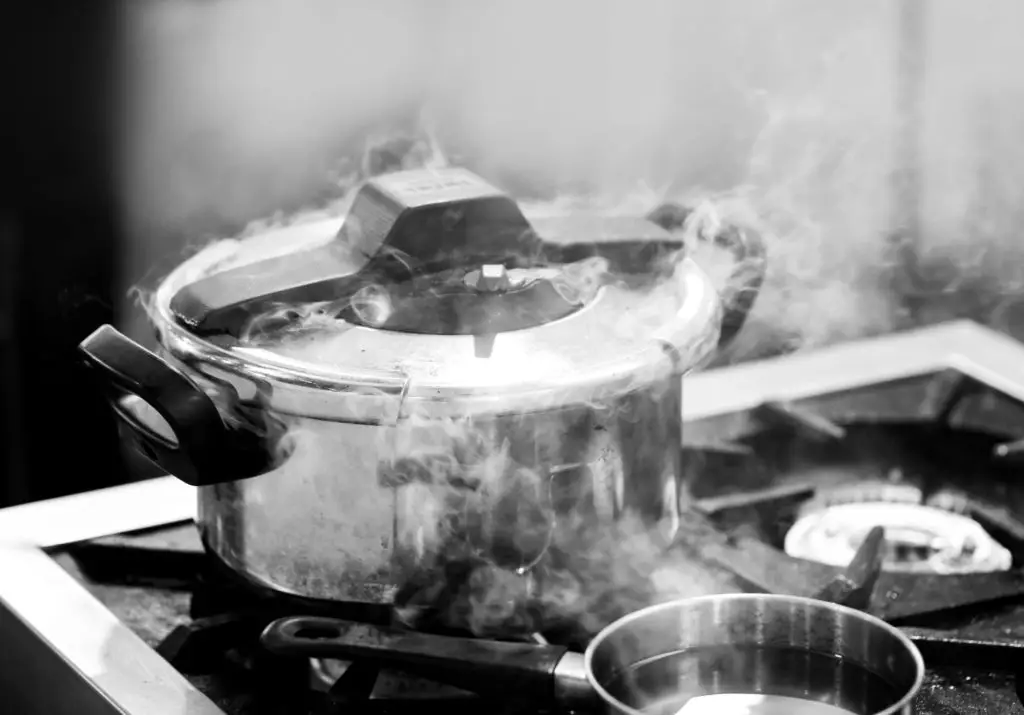
Pressure cookers are powerful kitchen appliances that are designed to cook your food faster, and many leading models also double as water bath canners and pressure canners. But cleaning them properly isn’t exactly fast and simple, especially if you don’t clean your model regularly after each use.
- For a basic clean, you’ll begin by removing the gasket. The gasket should be removed from the lid and cleaned separately using a little dish soap, and soft sponge, and warm water.
- The base of the cooker should also be washed using mild dish detergent and a soft sponge.
- Once you’ve rinsed off all the parts, towel dry them promptly. Take special care to ensure each piece is dried thoroughly to prevent mold This is important, especially if the pressure cooker also works for pressure canning.
- Next, place the rubber gasket back under the cover. Some gaskets must be lined up a certain way. If you’re not sure you’ve replaced it correctly, test it out before you use the pressure cooker. If it’s placed incorrectly it will have a negative impact on the machine’s ability to build pressure. Some manufacturers also suggest disassembling the pressure regulator valve and cleaning it as well. To learn more, consult the machine’s user manual.
- The pressure cooker cover should never be fully submerged in water since it can damage the safety valves. Obviously, most models are not dishwasher safe since dishwasher soap and food particles can clog the pressure regulators.
Tips on How to Clean Pressure Cooker Lid
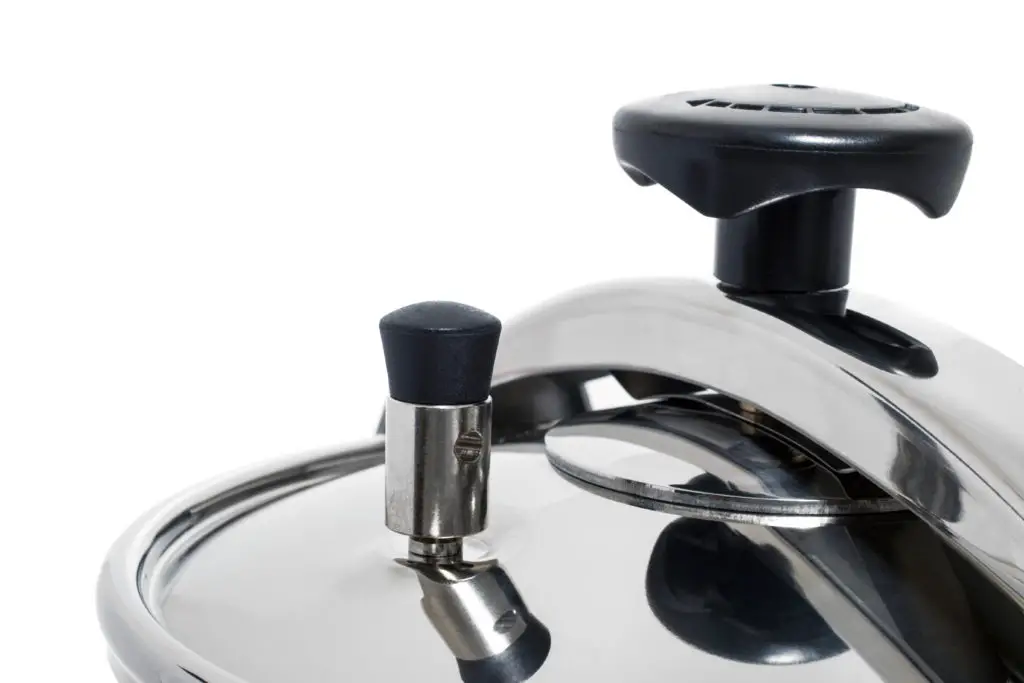
Did you know that the lid of a pressure cooker is one of the main factors behind depressurizing and pressurizing? By far, it’s the strongest component on this appliance and it’s what will determine the quality of the machine itself.
The lid consists of several parts that are designed to release, maintain, and build pressure to help you prepare food using the correct level of pressure that will cook your food to perfection.
Lid Design
The lid consists of the handle, which is equipped with a locking mechanism, a button or slider, which will lock up and secure the lid when cooking. Next is the gasket, which is used to seal the cooker to allow the pressure to build and prevent steam and pressure from escaping.
A steam vent will come with a pressure regulator located on the front of the appliance. It’s used to maintain and regulate the internal temperature. The pressure indicator will display the pressure level. Some models are also equipped with a pressure release valve which will release any extra pressure that builds up while cooking.
There are four basic styles of cooker lids:
- The twist on design is probably the most commonly found design on newer models. For this design, the lid rests on top of the pot and is twisted to lock the lid in place.
- The center screw lid is found on most vintage models, however, you can also find them on some newer models. With this design, the lid is secured via a screw and a bar.
- The internal lid design consists of an oval-shaped lid that’s placed inside at an angle. A variety of springs are used to hold the lid in place until the correct level of pressure is reached. This lid is much larger than the pot’s opening and should be turned to align it with the pot’s opening.
- The bolt-down lid features a few flanges on the body and the lid. The lid is secured by sliding the bolt through the flanges and wingnuts are used to lock them in place. This design is also commonly used for the best pressure canner and pressure cooker combo models, such as the T-fal pressure cooker and canner.
Each style of lid has its own pros and cons. However, the goal of each of these designs is to secure the lid firmly in place and prevent both pressure and steam from escaping.
You’ll want to pay close attention to the type of lid used on your pressure cooker so you can determine the best way to clean it and how many parts can and should be removed for a more efficient cleaning process.
Washing the Lid
Most lids should never be placed in a dishwasher unless the manufacturer labels the lid as dishwasher safe. If you have a pressure cooker with a new valve system, never allow the lid to soak in water.
All of the lid’s removable parts should be removed, such as the gasket, and pressure weight before you wash the lid. Each of these components should be washed separately using hot or warm soapy water.
When you wash the lid, be mindful of the locking flanges and vent pipe, if they’re attached to the lid. Avoid using abrasive cleaners and use a sponge or non-metal scrubber. The pressure regulator weight should be cleaned by hand and you’ll need to use a small brush to clean it from the inside.
The valve system will also need to be cleaned to remove any remaining food particles. Pay close attention to the sealing surface and remove any food particles and residue. After each of the components has been cleaned, dry each part thoroughly before reassembling the lid.
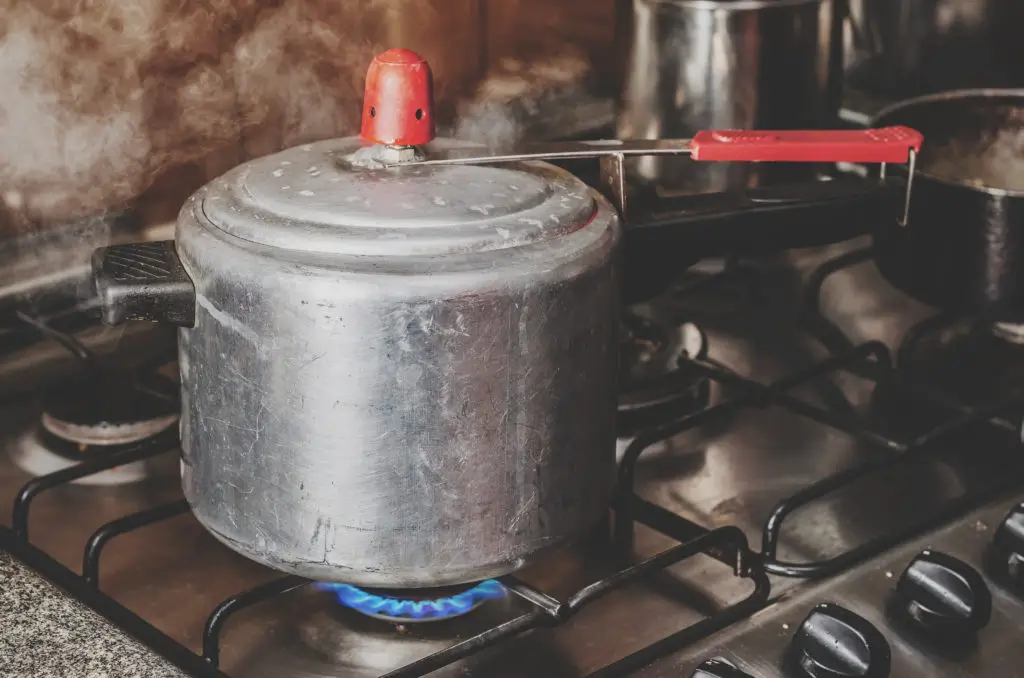
Cleaning the Safety Plug
Depending on the type and style of cooker you have, you may come across a few different types of safety plug designs.
- Most new models of pressure cookers will have a fuse plug or pressure plug. While it’s more efficient compared to the fuse plugs you’ll find in vintage models, the appliance will not function correctly if the plug melts. Because of this, the plug will need to be replaced prior to using a pressure cooker if you notice the plug has been damaged.
- Old style fuse plugs are found on the lid. These plugs are made out of metal and are very sensitive to excess heat and can start to melt when overheated.
- An overpressure plug can also be found on the lid. This type of plug is made out of rubber and is designed to help release pressure.
A tiny metal valve stem is also included and it moves up, allowing the plug to seal when the pressure builds. To properly maintain the lid, make sure both the metal valve and plug are clean.
As you can see, the lid is one of the most important components of a pressure cooker. It’s what creates a secure, strong seal, allowing steam to build up inside so that it can safely release the steam via the pressure release valve or vent pipe.
If the valves or pipes are dirty, then steam cannot be vented efficiently. This can be potentially dangerous. It can also impact how well the machine builds pressure. Because of this, regularly cleaning the lid and all of the aforementioned components will be crucial.
How to Clean Aluminum Pressure Cooker
Clean the pressure cooker lid and base, inside and out using warm water and mild dish detergent. Next, you’ll fill the pot three-quarters of the way full with warm water and a couple of tablespoons of cream of tartar. On the stove, bring the water to a boil, then reduce it to medium-high heat. The water should boil at this level for fifteen minutes until the inside of the pot is no longer discolored.
Next, dump out the water and allow the pot to cool down. If there are any remaining stains on the exterior or in the interior, use a steel wool scrubbing pad to remove them. However, don’t apply too much pressure. On the exterior, apply a thin layer of silver polish. Rub it in using a soft cloth or dishtowel and follow the usage instructions on the package.
If using the cream of tartar and boiling water trick didn’t help to revive your pressure cooker, add a tablespoon of lemon juice and try another round. Often, citric acid can help to get rid of stubborn oxidation.
How to Clean a Burnt Pressure Cooker
Nothing can be worse than spending time cooking up a perfect dinner only to realize that your pressure cooker is in desperate need of a deep clean. Caked on or burned food can be difficult to remove, but with the following tips and tricks, you should have no problem restoring your pressure cooker to its former glory.
Make sure you soak the pressure cooker in warm water and baking soda to remove any burnt-on food and stains. You can also use a soft scrub pad or sponge to gently remove any burned food particles.
Baking Soda to the Rescue
Baking soda can also be used to get rid of the tough ring of crud that’s developed around the bottom of the pot. Add a tablespoon of baking soda to the pot and fill it up with water. Allow the pot to simmer for two to three hours. If this trick doesn’t work, try adding a teaspoon of dish detergent.
Boiling Method
Another easy way to remove burnt-on food is to fill the pot with water and allow it to boil for fifteen minutes. This can help to loosen the stuck-on food so you can easily scrub it off.
If you’ve had your pressure cooker for a few years, then it probably has a few stains inside the pot that tend to build up over time. To make it look new again, fill the pot with water, enough to cover the stained areas. Place four large onions inside the pot. Boil the water for half an hour. Remove the pot and allow it to cool before dumping out the onions and water. This will work like magic to remove even the toughest stains.
Mineral Deposit Buildup
A white layer of mineral deposits can develop over time. One easy way to clean your pot is by using white wine vinegar. Since it’s acidic, it can help dissolve the grime.
The pot should be filled close to the top. Add half a cup of vinegar and allow the pot to soak overnight. In the morning, wash it and dry it and you should see a noticeable difference. If there is still some mineral deposit buildup left, repeat the process the next day.
Easier Cleanup
Never store any cooked food in a pressure cooker since it can make it more difficult to clean out the pot.
The pot should be soaked for half an hour in warm water after each use. This can help to loosen up any burnt-on food and remove any residue. Use a cloth or sponge to scrub the surface.
Staying on top of cleaning your pressure cooker can also prevent harmful bacteria growth, which can be potentially dangerous. To learn more, read my guide on does pressure cooking kill bacteria?
Final Thoughts
Now that you know how to clean a pressure cooker, how to properly maintain it, and how to restore your pressure cooker back to its former glory, you will probably notice a major difference in how efficiently it works, providing better, faster results.
Remember, a dirty pressure cooker will not only have an impact on how well the machine works, but it can also be potentially dangerous. Practice proper maintenance after each use to ensure your pressure cooker remains in top working order.
Originally posted 2019-10-14 10:02:13.

![7 Best Island Punch Pucker Substitutes [ALMOST Identical]](https://wowcookery.com/wp-content/uploads/2022/05/island-punch-pucker-90x75.jpg)
![10 BEST Luxardo Bitter Bianco Substitutes [ALMOST Identical]](https://wowcookery.com/wp-content/uploads/2022/05/luxardo-90x75.jpg)


