The best pressure canners come with important safety features that will vent excess steam and pressure, intuitive controls, and pressure regulator systems that are simple to use. These massive pots can also be used for more than just canning.
In fact, some can also be used as a pressure cooker, steamer, and water bath canner. But finding an appliance that offers pressure level regulation and precise temperature control isn’t easy.
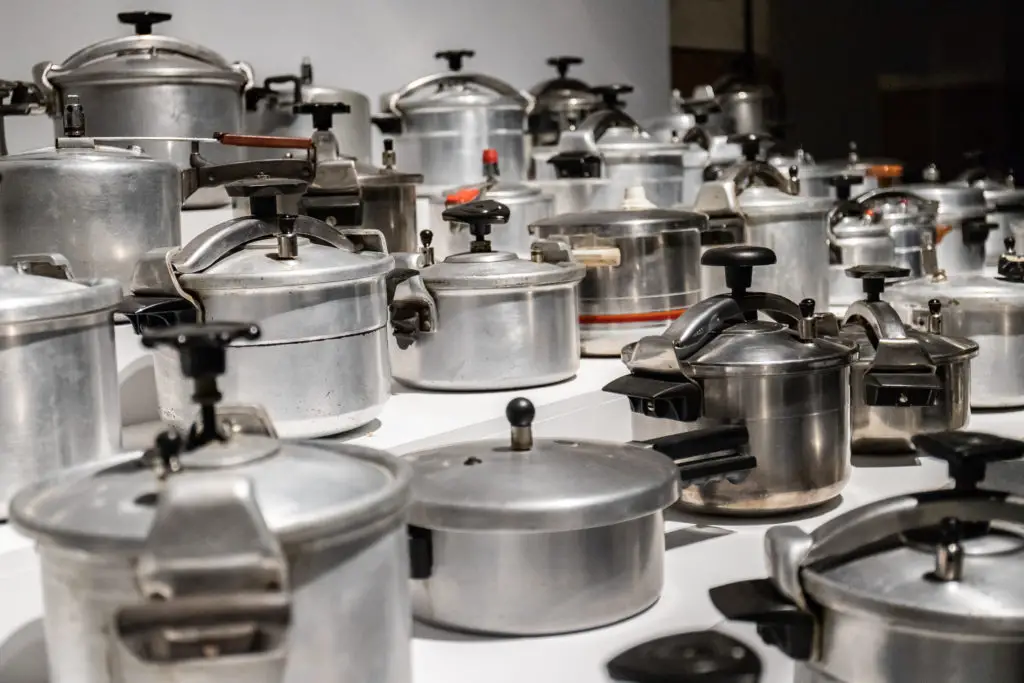
I’ve reviewed several of the leading models on the market and narrowed it down to the top six pressure canners. Each of these models earned top marks for their built-in safety features, durable designs, simple controls, and versatility.
Below, you’ll find a comparison chart that lists the similarities and differences between each of these models, which will help you quickly determine which canner will work the best for your budget and your canning and cooking needs.
Table of Contents
Pressure Canners Comparison Chart
| Product | Pressure Regulator | Capacity | Cost | Rating |
|---|---|---|---|---|
Presto 01781 23-Quart | Dial | 23-quart | $ | |
T-Fal Pressure Cooker | Dial | 22 quart | $ | |
Ball FreshTECH | Dial | 21 quart | $ | |
Mirro 92122A | Dial | 22 quart | $ | |
Granite Ware Pressure Cooker | Weight | 20 quart | $ | |
ALL AMERICAN QUART 921 | Dial | 21 1/2 quart | $$ |
Best Overall-Presto 01781 23-Quart Pressure Canner and Cooker
Our Rating:

This model by Presto is fast, efficient, and powerful. It features a twenty-three-quart capacity and a strong-lock steel lid that will fit securely over the pot and works to maintain a consistent pressure level, based on the chosen setting. It offers five PSI, ten PSI, and fifteen PSI pressure setting options.
The pot can be used for both pressure canning and as a pressure cooker, allowing you to cook dinner in a fraction of the time it would take on the stovetop or in the oven. Durable, built to last, and beginner-friendly, this model scored high in a variety of areas thanks to the innovative design that allows you to can like a pro.
Beginner-Friendly-T-Fal Pressure Cooker and Pressure Canner
Our Rating:

This appliance by T-Fal works as both a pressure canner and cooker and comes loaded with some important features including a locking system that prevents users from removing the lid until the pot is depressurized, a double rack so you can process twice as many jars, and a safety valve that vents off any excess pressure and steam.
This model is built with the beginner in mind. The controls are basic and intuitive, so it’s easy to choose the correct pressure level and closely monitor the internal temperature. The well-built pot is lightweight and low-maintenance, however, it will need to be cleaned after each use to prevent mineral deposit buildup.
Learning how to clean a pressure cooker is important to keep it in optimal working order and ensure that it’s able to maintain the correct pressure level. Overall, the simple design combined with the safety features ensures that even the beginner can easily use this pot to whip up dinner or process a large batch of canned goods in a matter of minutes.
Best Water Bath Canner-Ball FreshTECH Electric Water Bath Canner and Multi-Cooker
Our Rating:

This model can be used for pressure cooking and water canning. The versatile design allows you to process high acid foods such as sauerkraut, pickles, and tomato sauce. Or you can use it in pressure cooker mode and cook stews, pasta, chicken, or roasts.
Built tough it also features precise temperature control, basic controls, and a lightweight design complete with a tempered glass lid that allows you to closely monitor your food as it cooks, without removing the lid and allowing the steam to escape.
Best Value-Mirro 92122A Pressure Canner
Our Rating:

This model can be used for pressure canning and pressure cooking. It comes with three pressure level settings and a large cooking capacity that allows you to process more jars per batch. The larger cooking capacity will also allow you to cook an entire roast, seventy percent faster than you can in the oven. This durable model is available at a price that’s affordable for the family on a tight budget.
Most Versatile-Granite Ware Pressure Canner/Cooker/Steamer
Our Rating:

This is a multipurpose model that allows you to steam fish, seafood, and veggies, use it as a pressure cooker, or use it for pressure canning. It comes with a large steam insert, canning rack, and intuitive controls that offer a more hands-off cooking experience.
This multifunction machine is a must for anyone in search of a versatile pressure canner that offers a variety of cooking options, a larger pot capacity, and a durable design.
Best Lid Design-All American 21-1/2-Quart Pressure Cooker Canner
Our Rating:

If you don’t want to deal with replacing your canner’s gasket every year or two, then check out this model that’s designed with a wingnut locking system and a metal on metal design that completely eliminates the need for a gasket.
It also offers a higher than average cooking capacity, a lightweight aluminum design, and an automatic overpressure release valve that will vent excess steam and pressure for a safer cooking and canning process.
Pressure Canners Buyer’s Guide
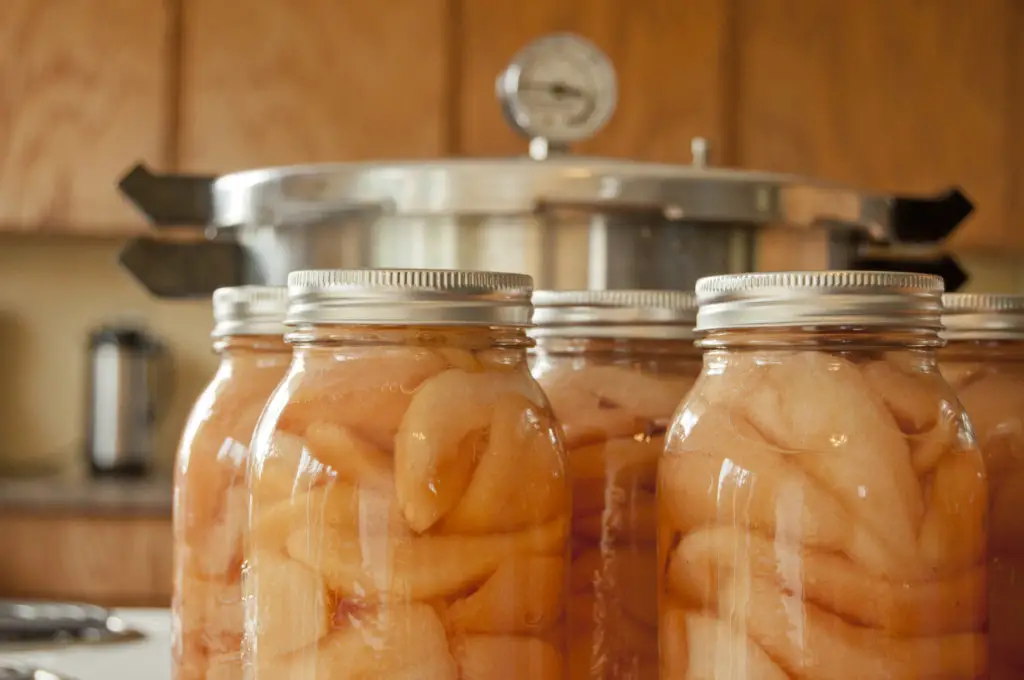
Learning how to can your favorite fruits, preserves, meats, fish, and veggies can be very fulfilling. It will leave you with a sense of accomplishment, each time you head into the pantry and grab a jar of fresh fruit you canned yourself. But there are many models to choose from these days, as more and more families search for ways to save hundreds of dollars a year on their grocery bill.
There are a couple of different ways to can: water bath and pressure canner. But the water bath method is commonly used mainly for acidic foods such as tomatoes, pickles, and sauerkraut. For other types of canned goods, you must can them at a much higher temperature.
If you want to learn how to prepare and can low-acid foods including poultry, seafood, veggies, fruits, and red meats, then you need the best pressure canner. These foods I’ve mentioned belong to a low acid group because they have a pH level of 4.5 or higher.
A high temperature must be maintained in order to kill bacteria. Fortunately, a pressure canner can easily achieve a temperature of two hundred degrees and greater. It’s also the only type of canning method that’s USDA recommended for low acid foods including fish, meat, and veggies.
A water bath canning process can only reach the standard boiling point of around two hundred and twelve degrees, which can’t kill off all the types of bacteria that can grow in low acid foods. Instead, the type of temperature needed can only be achieved by creating steam under pressure.
Size
A canner’s size will determine how many jars you can process per batch. Sixteen quarts up to twenty-three-quart canners are the most common size. Models of this size can hold around seven quarts, while larger models can hold up to fourteen quart jars.
However, you can also stack jars in a canner, which is why you can process more jars than you can when using the water bath method. Processing with a canner is a much longer process compared to the water bath method. Buying a bigger canner can be a better idea since you can process twice as many jars at one time. The smallest model will have a four-jar capacity.
The Right Capacity
Obviously, you’ll want to choose a machine based on your canning needs. If you’re only planning on making a few jars, then a smaller model will be sufficient. But if you’ve stocked up on in-season produce, or if you have your own garden, then buying a larger model is a must. Canning is a very time-consuming process, especially if there’s a lot of prep work involved for certain foods such as applesauce or sauerkraut.
So, if you want to save precious hours that would otherwise go toward canning batch after batch, then opt for a bigger model that will allow you to process around fourteen jars in one shot. Of course, the bigger the machine the higher the price tag, but if you’re able to get by processing all you need for the winter in just a single afternoon, then the steep initial cost is well worth saving a lot of time preparing for the upcoming winter months.
Pressure Gauges: Weighted and Dial
The difference between these two gauges is how they regulate the pressure. A weighted regulator will use a weight that will lift up automatically to release any excess pressure. You can use different weights for different pressure levels. A dial pressure gauge will require you to manually adjust the source of heat in order to maintain the proper temperature.
A weighted gauge is a round, small disk or weight that’s placed on the canner’s vent port to maintain the internal pressure. A model with a weighted gauge can exhaust small amounts of steam and air every time the gauge jiggles and rocks during the process.
These weights will precisely control the pressure and don’t require constant monitoring for accuracy. The sound of if jiggling and rocking will indicate that the machine is maintaining the correct pressure level. The only real drawback with this type of gauge is that they are not quite as precise in higher altitudes.
Dial gauges are attached to the cover of the canner and come equipped with a needle that points to the correct level of pressure on the inside of the machine.
Gauge Testing
Keep in mind that you have to have a dial gauge tested before use. This style of gauge must be tested for accuracy each and every time you use the canner. If a gauge reads low or high by more than a couple of pounds when you test it at eleven pounds of pressure than it will need to be replaced.
If it’s off by less than a couple of pounds then you should follow the manufacturer’s troubleshooting recommendations. Lower readings tend to cause over-processing. To avoid over-processing, you can make simple adjustments if the gauge is reading lower than it should.
If the gauge is reading higher than it should, then this will result in under-processing. This can lead to undercooked food. Each pound of pressure is essential in order to reach the correct temperature needed to produce safe food.
Gasket-Free Design
When you’re canning, the gaskets can be an issue. If they come loose or they’re not correctly installed, then it can impact whether or not the machine can build pressure. Models with gaskets can also warp over time and have to be replaced. Many modern models of canners these days don’t have gaskets, but can still offer the type of tight seal you need, without the hassle.
Over-Pressure Release
Since these machines build a lot of pressure, you should definitely use caution, especially if you’re a beginner. However, new models aren’t as dangerous as models produced just a few years ago. These days, most models will come with an over-pressure release feature that’s automatic.
This means if the machine begins to build up too much pressure, a flap will open up automatically to release the pressure. This is an excellent feature to have.
Lockdown Lids
Models with lock-on covers will feature a gasket that’s placed between the pot and the lid to form a tight seal. These lids will usually rotate into place and come with marks on the lid and the pot that will ensure you’ve fastened the lid correctly.
Many lower-priced models use this type of closure system. But the big drawback here is that the gasket needs to be cleaned and removed after each use. Additionally, the gasket will lose elasticity over time.
Screw-Down Lids
Another option is a screw-down lid. These models use several wingnuts that are located around the outside of the pot. The wingnuts are tightened to form a seal with the pot and lid. However, you must be careful to screw each of the wingnuts in evenly, otherwise, the pot will be unable to build the correct level of pressure.
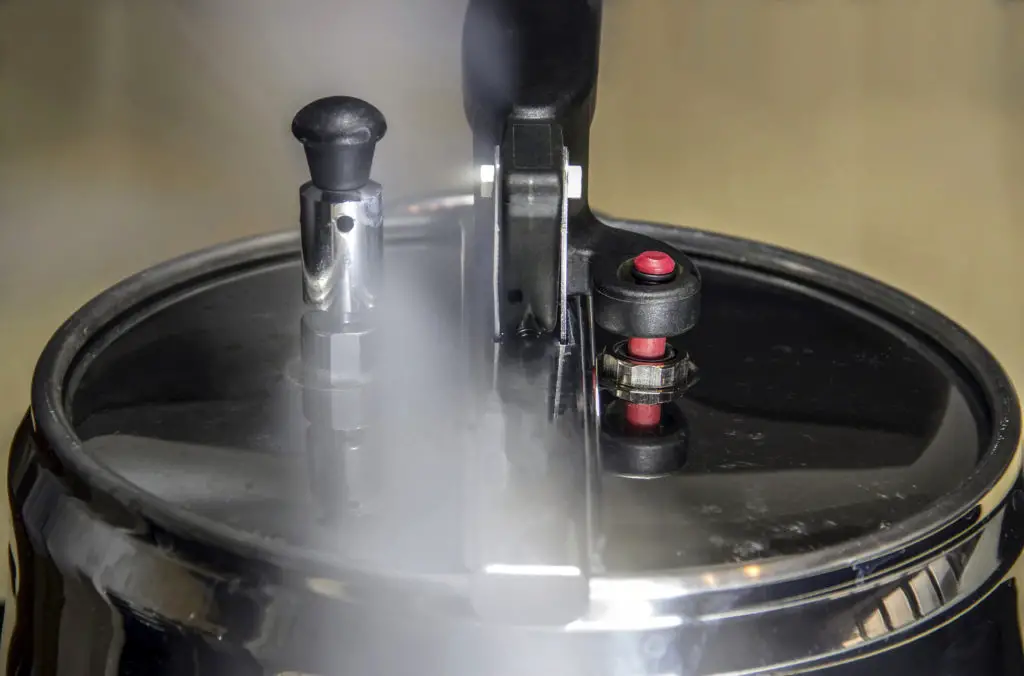
Vent
There will be a vent in the lid of the canner. This small opening allows excess steam and pressure to escape. Some models will have a vent where the weight gauge is located. This vent will blow off steam automatically if the pressure rises above a certain PSI.
Plug
This plug is a small piece of rubber that’s used as a safety precaution of sorts. If the vent becomes obstructed, then the plug will pop out in order to allow any excess pressure or steam to be safely released.
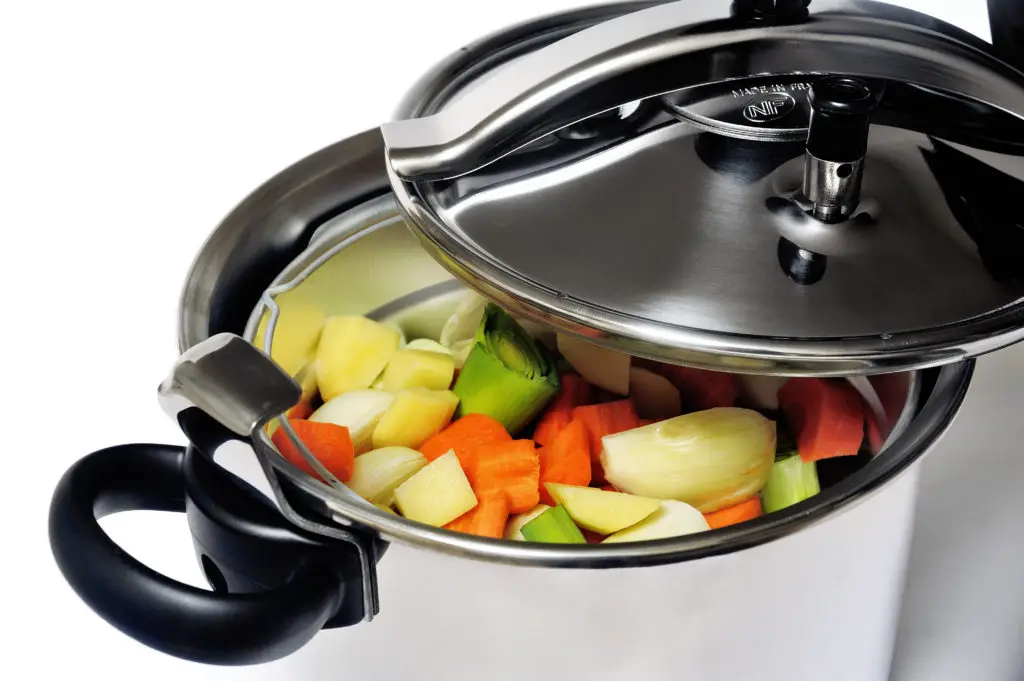
Racks
Each model will come with a rack, which is placed at the bottom of the pot. Once placed inside, you’ll use the rack to stack the jars. This allows for a space between the heat source and the bottom of the canner, which promotes even heat distribution. There are some models that come with several racks, which will allow you to choose a rack based on the size of the jar. You can also use multiple racks for stacking jars safely.
Durability
Heat stability is closely linked to a model’s durability. People who use thicker canners prefer the even heat distribution that only models with these extra-thick walls can offer. Manufacturers claim that this type of thick construction makes it easier for the appliance to maintain a constant temperature during the process. However, this extra weight can also equal a more expensive model.
Replacement Parts
The handles, gauges, valves, and gaskets are parts that need to be replaced periodically, especially if you accidentally drop the canner or the lid, or once the lid begins to lose its sealing ability. As you can see, buying one of these models should be considered an investment, especially considering that the right model can last several years and can save you hundreds of dollars over time.
Is There a Difference Between Pressure Cookers and Pressure Canners?
A pressure canner does not work the same as a pressure cooker. Because of this, it’s important to understand the difference between these two appliances in order to prevent illness due to improperly processed foods when canning.
The pressure cooker is used to cook food much faster than what it would take in the oven. This includes foods such as:
- Briskets
- Roasts
- Veggies
- Other types of foods.
A pressure cooker is not able to maintain precise pressure levels the way that a pressure canner is designed to. In fact, because a standard pressure cooker cannot maintain a stable pressure level as well as a pressure canner, they cannot safely be used to pressure can food.
Canners can have weighted or dial gauges and are used to safely can:
- Veggies
- Eggs
- Meats
- And other foods that are low in acid
In order to kill off harmful bacteria when canning low acid food, this can only be done with a pressure canning machine. Since the pressure cooker is specifically designed to cook at a much faster rate, the machine cannot apply the stable level of pressure that’s required for a determined length of time to safely process these foods.
Were you to process jars in a pressure cooker, you would run the risk of exposure to harmful bacteria, including botulism.
Other Differences Between Pressure Cookers and Canners
- A pressure cooker doesn’t come with a pressure gauge, which is necessary in order to keep a close eye on the pressure during the canning process. This is crucial since a level of five, ten, or fifteen PSI is required to kill off bacteria.
- Both types of appliances work by trapping the steam in order to build up pressure inside the appliance. The steam is trapped thanks to the lid, which is fitted with wingnuts or a gasket which forms an airtight seal when correctly locked, but this is really where the similarities end.
To sump up the differences:
- Pressure cookers are designed to:
Cook food at a much faster rate, allowing you to cook tougher, or larger cuts of meat, poultry, fish, and other entrees seventy percent faster than you can using the oven.
A pressure canner is used to:
- Pressure canners are used to process jars of food that are low in acid. This type of food must be kept at a high pressure level for a determined length of time to ensure that any bacteria is eliminated and the food is properly preserved.
The Art of Canning-Usage Tips for Beginners
If you’ve had a bad experience in the past using this type of appliance, then you’ll be relieved to know that modern models are much easier to use than ever before. Additionally, newer models are not only more beginner-friendly, but they’re also much safer.
- In the past, these models weren’t exactly intuitive, which often resulted in less than ideal results.
- If you’re still interested in learning how to can, then follow the tips below once your new model has arrived.
- If you’re using this type of appliance to preserve your harvest, practice using it before the big processing day. This will allow you to test a machine’s accuracy. Start off by adding a few inches of water and bring it to a boil.
Now, try testing the accuracy of the dial gauges. Follow the included instructions and make sure the seal is also steam tight. You can also have the gauge professionally tested at a local appliance or hardware store. - At this time, check the sealing gasket to ensure it’s able to make the type of seal needed to maintain a precise pressure setting. You should also check out the pressure plug, vent tube, and any other gaskets.
You can clean the vents out using a bottle brush or pipe cleaner. If you’re using an older model, doing this before use will be important and will allow you to remove any mineral deposits or food particles. - If the pot comes with a cover lock that has a piston in the handle or lid, make sure that it activates when pressurized and automatically releases once the pressure has dissipated.
- If the pot has a wingnut clamp down design and doesn’t have a sealing gasket, then apply a drop of oil to the wingnuts and make sure that the threads and nut heads are free of damage. The lid and pot rim should also be lightly lubricated.
- If you have a new model, many come with some great recipe books that will allow you to try out processing new types of foods. At this time, you can go over the recipes.
Make sure you read each recipe all the way through so you can create a list of all the ingredients you’ll need for each one. It’s always important to follow each recipe carefully, especially when it comes to food safety.
Processing

To place jars on the rack, if the rack is sitting in hot water, always use a jar lifter. It should also be used to remove the jars from the pot, even if you think the water has cooled down enough. The lifter should be placed below the neck of a jar, directly under the screw band.
Make sure you’ve filled up the pot with enough water. This is very important. When you can with pressure, it will require less water compared to the water bath method. However, a certain amount of water is needed to create the steam. If you can’t find out how much water a particular recipe calls for, then just add three inches. This is the standard amount for most recipes.
For a speedier processing time, preheat the water to one hundred and forty degrees for raw pack jars and one hundred and eighty degrees for hot pack jars.
Keep in mind, if the recipe calls for a longer processing time, you’ll need to use more water, just be careful to avoid overfilling the pot.
The Right Temperature and Pressure Settings
To kill off harmful bacteria, the ingredients should be heated between two hundred and forty degrees up to two hundred and fifty degrees. When you use water bath processing, the water only reaches around two hundred and twelve degrees.
Essentially, you can achieve a much higher temperature using steam heat. The trapped, hot steam will build pressure in the pot and increase the temperature up to two hundred and forty degrees or more. This will allow you to safely process low acid foods without the use of additional acids.
Once the jars are placed on the rack and the lid is securely in place, you can remove the weight from the vent pipe or open the petcock then fire up the heat. As the water reaches the boiling point, steam will be forced through the vent and will maintain the set temperature, allowing the steam to exhaust continuously based on the timer.
Ready to Go
Once the pot has vented, you’ll close the petcock or place the weighted gauge on the vent pipe. Then you’ll adjust the heat to maintain the right pressure level. If you have an electric range, then getting the precise temperature can be tricky, so make sure you lower or increase the heat using small increments for optimal temperature control.
The right pressure level must be maintained throughout the process. But the exact method you’ll use to ensure the correct pressure is evenly maintained will depend on the model you buy.
Start off by setting the processing timer once the gauge indicates that it has reached the perfect pressure level. If you have a weight gauge pot, once the weight begins to spin, rock, or jiggle, you’ll know it’s reached the correct level.
If you notice that the pressure has dropped you can bring it back up easily. These higher temperatures are essential for killing pathogens, however, the temperature must be maintained at all times to effectively kills off the bacteria.
Altitude Adjustments
With high altitude canning you have to increase the level of pressure, not the length of the processing time. The pressure can be controlled in a couple of different ways, to compensate for the loss of atmospheric pressure:
With a dial gauge canner, the burner should be adjusted to lower or increase the pressure
With a weighted gauge model, the weight will need to be increased so it can release any pressure above the set amount.
Once a Process is Complete
The contents of the jars and the jars themselves must remain level to depressurize at the same time as the pot. If you force the cooling down process it can result in seal failure. If you have a dial gauge pot, even when the dial reaches zero pounds of pressure, be careful when taking the weight off the pipe. The weight should be tilted away from you to allow any steam that remains to escape before the weight is completely removed.
This is a much faster process compared to older models. Because these new models have thinner walls, they will cool down faster and come with cover locks and vent locks that are designed to open once all of the pressure has been released.
Once the pot has depressurized, you can now open the petcock or remove the weights from the vent pipe. You will need to wait an additional ten to fifteen minutes before carefully removing the lid.
Final Thoughts
The best pressure canner can allow you to preserve that harvest you worked so hard for during the summer months. It can also allow you and your family to enjoy your favorite meats, fruits, and veggies, any time, instead of paying a higher price at the grocery store.
Essentially, you can end up saving hundreds of dollars a year on groceries since you can purchase in-season veggies and fruits at a time when they’re much more affordable, instead of paying double or triple what you would have to pay when your favorites are out of season.
Overall, the right pressure canner can handle heavy-duty use, can easily maintain the right pressure level, and will safely prepare your canned good for the season. I hope my guide and my in-depth reviews of the leading models have helped you to narrow down your choices to find a model that will work with your canning needs and your budget.
Originally posted 2019-10-14 11:03:57.

![7 Best Island Punch Pucker Substitutes [ALMOST Identical]](https://wowcookery.com/wp-content/uploads/2022/05/island-punch-pucker-90x75.jpg)
![10 BEST Luxardo Bitter Bianco Substitutes [ALMOST Identical]](https://wowcookery.com/wp-content/uploads/2022/05/luxardo-90x75.jpg)


